top of page
The
Perennial Garden
Home
Video
About
Blog
Info
Contact
Workshops
More
Use tab to navigate through the menu items.
The Perennial Garden | Staudehaven
Play Video
Play Video
06:46
A Look Back at June in the Garden | Summer Flowers & Perennials in Bloom
We thought we'd take you back through one of our favorite months in the garden — June. (We weren't sure if we had a favorite month... but I think it just might be the start of summer.) 1:14 Jump ahead to the flowers here... and skip over the introduction ;) So here's a quiet walk through our June garden — no talking, just the sound of music and the beauty of flowers in full bloom. We hope this peaceful garden tour captures perennials at their peak, the hum of summer life, and a moment to slow down and enjoy the colors of early summer. We garden on the east coast of Denmark, similar to Zone 8a. You’ll see a mix of perennials and pollinator-friendly plants like salvias, delphiniums, astrantias, foxgloves, and more — all part of the cottage garden we’ve built over the seasons. Whether you’re looking for flower inspiration, ideas for planting combinations, or just a few minutes of calm, we hope this relaxing summer garden video brings you a little joy. Here's the rest of our June garden tour: https://youtu.be/W5JBkKUkSY0?si=NnBHlg_46jgWo0vH Don't forget to subscribe and follow to see what's growing in our garden. Instagram: https://bit.ly/IGPerennialGarden #gardeninspiration #relaxinggarden #gardentour #relaxingmusic #summergarden #cottagegarden
Play Video
Play Video
19:55
What We Planted in Autumn | Greenhouse Autumn Sowing | Perennial Garden
In this video, we’re sharing what we planted here in the fall and how our autumn sowing is getting on in our unheated greenhouse. Plus, we’ll show you step by step how we sowed: Aquilegia (Columbine) Digitalis (Foxgloves) Snapdragons (Antirrhinums) You’ll see how they’re doing now, what’s worked best, and a few easy tips to help your autumn seedlings thrive through winter. Autumn is the perfect time to sow hardy perennials and biennials, giving them a head start for spring. Whether you’re new to greenhouse growing or just curious about what to sow in autumn, we hope this video will help you plan, sow, and grow successfully. If you want to know more about how we winter sow, check out these videos: https://youtu.be/2T5NplYd4ok?si=m9sj0jigWxpr1WTP https://youtu.be/5fvXAtwXPDU?si=rE1a0PH_YflDceCM https://youtu.be/RdsYbHahoRw?si=gcfQiCoj1gzdwvyt Don't forget to subscribe and follow to see what's growing in our garden. Instagram: https://bit.ly/IGPerennialGarden #greenhousegrowing #seedsowing #greenhouse #growyourown #gardeningtips
Play Video
Play Video
04:28
When & How to Cut Back Hostas | Fall vs Spring | Perennial Garden
Wondering when to cut back your hostas? Should you clean them up in autumn or spring? In this video, we'll show you exactly when and how to trim hostas for healthy regrowth and a beautiful garden next season. AND we'll talk about the advantages of cutting hostas back in the autumn versus the spring. We'll go over: ✅ The best time to cut back hostas (fall vs spring timing) and which time of year we prefer ✅ How to prune hostas correctly to prevent rot and pests ✅ What to do with dead hosta leaves and stems (spoiler alert: compost bin) ✅ Tips for winter hosta care and keeping your garden neat The fall is also a great time to divide Hosta. Here's how: https://youtu.be/IToYkWrM7J4?si=PwNlezB4_oWtqNGB How to divide Hosta: https://youtu.be/YTx6hS4Ui60?si=AhenM2zkZdjcVVW- Looking for more container garden ideas that go great with your Hosta? Here are a few of our favorites: https://youtu.be/PfMe-QJEy54?si=VGn-RrgTEQFh8R6O We made this video with beginner gardeners in mind, and we hope you can use our tips to help your hosta thrive year after year. Don't forget to subscribe and follow to see what's growing in our garden. Instagram: https://bit.ly/IGPerennialGarden #hostas #gardeningtips #fallgardening #gardenmaintenance #shadegarden #gardentips #plantcare #gardeningforbeginners
Play Video
Play Video
06:45
Why Autumn Is the Best Time to Plant Perennials | Perennnial Garden
Thinking about planting this fall? Autumn is actually the best time to plant perennials (and even trees and shrubs). In this video, we'll explain exactly why fall planting gives your garden a head start for next spring. We'll go over... ✅ Why warm soil helps roots establish quickly before winter ✅ How cooler temperatures reduce plant stress and drying out ✅ How autumn rain provides natural watering and saves time ✅ Why fall planting = stronger roots and better spring growth ✅ How to take advantage of autumn garden center sales Planting in fall means healthier plants, less watering, and a more vibrant garden next year. Whether you’re growing trees, shrubs, or perennials, we hope this quick beginner-friendly guide will help you get the timing just right! And it's almost time to plant spring bulbs: ➡️ https://youtu.be/uIyIawfI9l0?si=I2vn99BWBO7qW0py ➡️ https://youtu.be/Er7suePenK8?si=zv5x1VezRqNj-kfL Plus getting the garden ready for winter ➡️ https://youtu.be/lcmLxHRqSOM?si=Ro8gO2UfpJqcUuGA Don't forget to subscribe and follow to see what's growing in our garden. Instagram: https://bit.ly/IGPerennialGarden #fallplanting #gardeningtips #gardenmaintenance #gardeningforbeginners #gardenplanning
Play Video
Play Video
16:48
What’s Blooming in October | 11 Late-Season Flowers Going Strong | Fall Garden Tour
Wondering what’s still in bloom in October? In today’s video, we take a stroll through the garden to see which hardy perennials and annuals are still putting on a show this late in the season. From bold Monkshood to delicate Japanese Anemones, these plants prove autumn gardens don’t have to be dull and only for seeds. We're in Fredericia, Denmark -- similar to Zone 8a. Plants featured: 0:57 – Aconitum napellus (Monkshood) 2:30 – Anemone hupehensis (Japanese Anemone) 3:54 – Calendula officinalis (Pot Marigold) 4:40 – Linaria purpurea (Purple Toadflax) 5:48 – Calamagrostis brachytricha (Korean Feather Reed Grass) 6:29 – Verbena bonariensis (Tall Verbena / Purpletop Vervain) 7:47 – Sedum (Stonecrop) 10:04 – Gaillardia (Blanket Flower) 11:10 – Arctanthemum arcticum ‘Roseum’ (Arctic Daisy) 13:07 – Salvia viridis (Annual Clary Sage / Painted Sage) 15:16 – Persicaria affinis (Knotweed / Himalayan Fleeceflower) Whether you're planning your fall garden or just curious what’s still flowering in October, we hope this video is full of great plant ideas for late-season color. And a little glimpse into how we've used succession planting to have color all year long. If you love fall gardening, don’t forget to like, subscribe, and tell me what’s still blooming in your garden! Instagram: https://bit.ly/IGPerennialGarden
Play Video
Play Video
28:25
Autumn Seed Collecting | 12 Perennials to Sow for Next Year’s Garden | Perennial Garden
Autumn (September) is the ideal month to collect and save seeds from perennials. In this video, we walk through which of our plants are ready now and how to harvest and store their seed for use next spring. We garden in Fredericia, Denmark (Zone 8 equivalent), so if you're in a similar climate, these plants should work well for you too. Plants Featured 0:20 – Echinacea purpurea (Purple Coneflower) 3:56 – Silene vulgaris (Bladder Campion) 7:07 – Astrantia (Masterwort) 9:54 – Asters (Michaelmas Daisy) 12:04 – Althaea officinalis (Marsh Mallow) 13:37 – Physostegia virginiana (Obedient Plant) 14:37 – Heliopsis ‘Burning Hearts’ (False Sunflower) 18:14 – Eupatorium dubium ‘Baby Joe’ (Joe Pye Weed) 19:39 – Liatris (Blazing Star/Gayfeather) 21:03 – Antirrhinum (Snapdragon) 22:31 – Linaria purpurea (Purple Toadflax) 24:25 – Autumn-sown seedlings We show how to tell when seed is ripe, the easiest way to collect it, and how to store it so it stays viable until sowing. More seed-saving and propagation videos here: https://youtube.com/playlist?list=PLKlRXjB7gnsx7dS9eApMc_7rytTEvXFwQ&si=rHSv8VKGWjTcZNBk And for the seeds that need cold stratification, here's how we do it without milk jugs: https://youtu.be/2T5NplYd4ok?si=CN6Prk-RiIBwzbIV Don't forget to subscribe and follow to see what's growing in our garden. Instagram: https://bit.ly/IGPerennialGarden #perennials #seedcollection #cottagegarden #seeds #seed #seedsaving
Play Video
Play Video
28:24
How to Divide & Move Perennials in Autumn | Easy Propagation Tips | Perennial Garden
In this video, we’re giving our flower beds some love by dividing and moving a few perennials here in early autumn. Some plants just needed a new home, others were ready to be divided for their own health, and a few are getting shared with friends and neighbors. We’ll walk you through how and why we’re moving things around, plus some practical tips on dividing perennials so they bounce back strong next year. It’s the perfect way to refresh your garden and make sure your plants thrive season after season. (We're in Fredericia, Denmark -- similar to Zone 8a) If you’re thinking about adjusting your planting scheme, fixing problem spots in the garden, or simply multiplying your favorite perennials, autumn is the best time to do it. Join us for this little update and see how we’re preparing the garden for next year’s color. Looking for more gardening jobs in the autumn? Seed collecting: https://youtu.be/DEvezIW9iME?si=lhGO5QH4OuBYsB9V Taking cuttings: https://youtu.be/FkQBkURMFtU?si=2yXUZ1wuyqE7bggy Planting bulbs: https://youtu.be/lcmLxHRqSOM?si=wZtpo9sWC5cFcBi4 ...and even more perennials you can split for free plants: https://youtu.be/scC6FVO9PeE?si=NhWyme0vgQdc7otk Don't forget to subscribe and follow to see what's growing in our garden. Instagram: https://bit.ly/IGPerennialGarden #propagation #fallgardening #gardentips #autumngarden #flowergarden #gardenideas #seasonalgardening
Play Video
Play Video
30:35
Fall Garden Refresh | Planting Perennials for Autumn Color | Perennial Garden
We’re updating one of our flower beds here at the start of autumn with some new perennials we picked up at end-of-summer sales. Autumn is one of the best times to plant... cooler air and warm soil help plants settle in before winter. (We garden on the east coast of Denmark -- similar to Zone 8a.) In this video, we’re planting 3 additions (and moving a few more): 1. Helenium (Sneezeweed) – for late-summer and autumn color 2. Caryopteris ‘Blue Cloud’ (Bluebeard) – a pollinator-friendly shrub with blue flowers 3. Pennisetum x advena ‘Tiny Tails’ (Fountain Grass) – a compact ornamental grass We’ll move a few plants around, talk through why we chose these perennials, and share tips for planting in autumn. If you’re looking for fall garden inspiration, perennial planting advice, or ideas for a flower bed refresh, we hope this video can help. Don't forget to subscribe and follow to see what's growing in our garden. Instagram: https://bit.ly/IGPerennialGarden #planting #flowergarden #gardendesign #fallgarden
Play Video
Play Video
55:17
August Garden Tour 2025 | Late-Summer Perennials in Bloom + Baby Quails I Perennial Garden
Welcome back to the garden! In this August garden tour, we’re sharing what’s in bloom right now, from pollinator favorites like coneflowers and verbena to late-summer stars such as helenium, eupatorium, and dahlias. We’ll also show you how we take sedum cuttings in water, check in on our greenhouse cuttings, and even introduce you to our 6 new baby King Quails. (We're on the east coast of Denmark -- similar to Zone 8a.) Here’s what we’ll see together: 0:54 Knautia arvensis (Field Scabious) 1:48 Heliopsis helianthoides var. scabra 'Bleeding Hearts' (False Sunflower) 2:24 Salvia nemorosa 'Caradonna' (Wood Sage) 2:46 Linaria (Toadflax) 3:21 Verbena bonariensis (Tall Verbena) 3:41 Echinacea (Coneflower) 4:13 Helenium (Sneezeweed) 4:35 Physocarpus opulifolius 'Diabolo' (Ninebark) 5:09 Eupatorium maculatum (Joe Pye Weed) 5:54 Astrantia (Masterwort) 8:23 How to take Sedum cuttings in water 10:53 Anemone hupehensis (Japanese Anemone) 11:48 Lysimachia clethroides (Gooseneck Loosestrife) 15:13 Aster divaricatus (White Wood Aster) 15:22 Anemone leveillei (Leveille’s Anemone) 15:35 Hakonechloa macra 'All Gold' (Japanese Forest Grass) 19:43 Sanguisorba 'Pink Brushes' (Burnet) 22:14 Dahlias in bloom 26:40 Hydrangea paniculata 'Little Spooky' (Panicle Hydrangea) 28:07 Asters 35:29 Meet our 6 NEW baby King Quails 38:06 Checking on our greenhouse cuttings 47:58 Sedum spurium ‘Deep Rose’ (Creeping Stonecrop) 51:48 Gaillardia (Blanket Flower) For more info on cuttings, here are few more plants that are great to propagate from cuttings: Butterfly Bush: https://youtu.be/3BEvitIAi1A?si=AO2N5Z0JyX4t67Y2 Lupines: https://youtu.be/K192v44CfI0?si=5Ov1-w8wD-aP0Lur Bleeding Hearts (Dicentra): https://youtu.be/EHdH6hs0Rcc?si=mziuuCsgzZ5R-Vur Thanks for joining us in the garden today. Don't forget to subscribe and follow to see what's growing in our garden. Instagram: https://bit.ly/IGPerennialGarden #gardening #flowergarden #flowergarden #cottagegarden
Play Video
Play Video
19:02
13 Must-Have Perennials for Late Summer Color | August Garden Favorites I Perennial Garden
Want to keep your garden full of color through August all the way to September? In this video, we're sharing 13 of our favorite late summer perennials that bloom beautifully when much of the garden is starting to fade. These are tried-and-true plants we grow ourselves — perfect for adding height, texture, and pollinator-friendly color in late summer. Here are the stars of the show: 0:14 – Anaphalis triplinervis (Pearly everlasting) 1:58 – Rudbeckia fulgida (Perennial coneflower) 3:39 – Kniphofia 'Flamenco' (Red hot poker) 6:19 – Liatris (Blazing star) 7:26 – Echinacea (Coneflower) 9:57 – Monarda (Bee balm) 10:43 – Agastache ‘Blue Fortune’ (Giant hyssop) 11:18 – Aster 12:36 – Verbena bonariensis (Tall verbena) 14:34 – Heliopsis helianthoides var. scabra 'Bleeding Hearts’ (False sunflower) 15:51 – Helenium (Sneezeweed) 16:48 – Eupatorium maculatum (Joe Pye weed) 17:50 – Eupatorium dubium 'Baby Joe’ (Dwarf Joe Pye weed) These low-maintenance, sun-loving perennials will keep your garden buzzing with life and full of color right into early fall. Which one’s your favorite? Let us know in the comments! Here are a few more from last year: https://youtu.be/6cWf1mg1huk?si=tGQILXj51lqJfllW And don't forget seed collecting in the fall: https://youtu.be/DEvezIW9iME?si=Yc__DKOYXNqrhNur Don't forget to subscribe and follow to see what's growing in our garden. Instagram: https://bit.ly/IGPerennialGarden #gardendesign #flowers #AugustGarden #PerennialGarden #pollinatorplants #cottagegarden
Play Video
Play Video
15:47
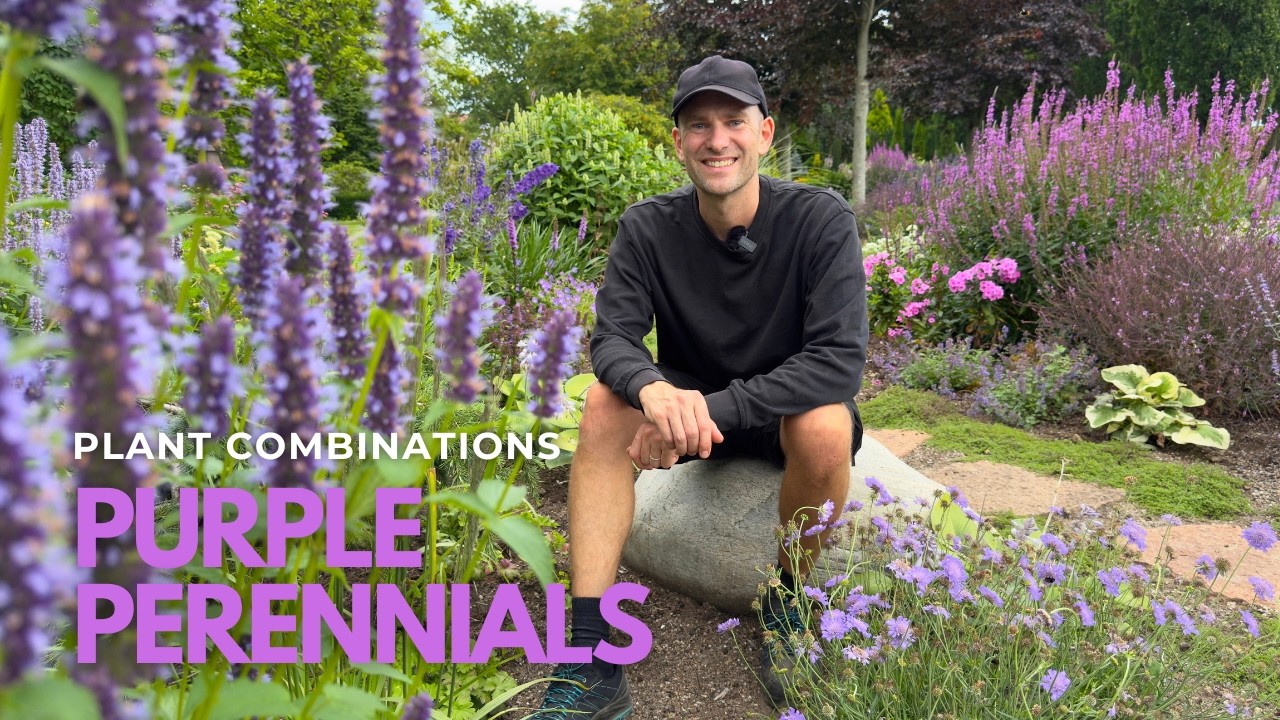
Designing with Purple Flowers | Perennial Combinations for Your Garden | Perennial Garden
Looking to add more purple flowers to your garden? In this video, we’re sharing our favorite purple perennial combinations that look beautiful throughout the season. Purple is such a versatile color in the garden — it plays well with greens, adds contrast to warm colors, and attracts pollinators like crazy. We walk through 4 planting combinations that Lars and team have used in the borders where he works — blending grasses, perennials, and foliage for structure and long-lasting interest. Whether you're designing a new bed or refreshing an old one, we hope these ideas will be perfect for anyone who loves a naturalistic, cottage-style, or pollinator-friendly garden. ➡️Combination 1: Lythrum salicaria (Purple loosestrife) Heliopsis helianthoides var. scabra 'Bleeding Hearts’ (False sunflower) Agastache rugosa 'Alabaster’ (Korean mint) Eryngium (Sea holly) Agastache 'Black Adder’ ➡️Combination 2: Geranium 'Rozanne’ (Cranesbill) Brunnera macrophylla 'Jack Frost’ (Siberian bugloss) Liatris (Blazing star) Calamagrostis brachytricha (Korean feather reed grass) Linaria purpurea (Purple toadflax) Lupinus (Lupine) Verbena ‘Bampton’ ➡️Combination 3: Astilbe 'Dark Side of the Moon’ Salvia verticillata 'Purple Rain’ Penstemon digitalis (Beardtongue) Allium senescens 'Millenium’ (Ornamental onion) Miscanthus sinensis 'Morning Light’ (Maiden grass) ➡️Combination 4: Salvia yangii (Russian sage) Verbena 'Bampton’ Linaria purpurea Liatris, Lythrum salicaria Heliopsis 'Bleeding Hearts’ Centranthus ruber 'Albus’ (White valerian) Don't forget to subscribe and follow to see what's growing in our garden. Instagram: https://bit.ly/IGPerennialGarden #gardendesign #purpleflowers #PerennialCombinations #CottageGarden #flowers
Play Video
Play Video
14:19
Garden Design Ideas for a New Flower Bed | Purple Perennials & More | Perennial Garden
I'm excited to show you a flower bed transformation the gardening team did this year at the cemetery garden (where Lars works). What was once a forgotten, weed-filled patch of nettles and rough soil is now a beautiful, welcoming space filled with rich soil, neat paths, and gorgeous perennials — many with lovely purple hues. In this video, we take you through the whole process — from clearing the area to planting — and share ideas for planting combinations that thrive in summer. Whether you’re looking for inspiration for a shady spot or want to add more purple tones to your garden, we hope you’ll find plenty of ideas here. Here are the plants we highlight: 0:00 – How we transformed the space (from weeds to flower bed) 1:17 – Perovskia atriplicifolia / Salvia yangii (Russian sage) 1:38 – Verbena ‘Bampton’ (Garden verbena) 2:00 – Lythrum salicaria (Purple loosestrife) 2:38 – Phlox paniculata (Garden phlox) 3:02 – Thymus praecox 'Coccineus' (Creeping thyme) 3:44 – Delphinium (Delphinium) 4:39 – Liatris (Blazing star) 4:52 – Geranium ‘Rozanne’ (Cranesbill) 5:35 – Astilbe 'Dark Side of the Moon' (Astilbe) 6:52 – Plants for under a tree (shady planting ideas) 7:47 – Salvia verticillata (Whorled clary) 8:47 – Eryngium (Sea holly) 8:58 – Agastache (Hyssop) 9:40 – Heliopsis 'Bleeding Heart' (False sunflower) 11:04 – Lamium maculatum (Spotted deadnettle) 11:43 – Nepeta (Catmint) 12:37 – How to take cuttings of Iberis sempervirens (Evergreen candytuft) This flower bed has come alive in just a few months and is a beautiful spot for anyone who loves perennials, especially purple-flowering plants. We hope it inspires your next garden project! Don't forget to subscribe and follow to see what's growing in our garden. Instagram: https://bit.ly/IGPerennialGarden #gardentransformation #gardendesign #purpleflowers #plantingideas
Play Video
Play Video
40:56
40+ Perennials in Flower in July I Summer Garden Tour | Perennial Garden
Welcome to our July garden tour in Denmark (similar to zone 8a)! It’s the height of summer and the borders are buzzing with flowers, bees, and other pollinators. In this video, we walk you through what’s blooming right now, what we’re cutting back (like Salvia and Alchemilla), and which flowers we’re starting to collect seeds from. Here's what we're growing now: 00:37 – Heliopsis 'Burning Hearts' (False sunflower) 00:59 – Veronicastrum virginicum (Culver's root) 01:16 – Veronica longifolia (Long-leaf speedwell) 01:43 – Knautia arvensis (Field scabious) 03:15 – ✂️ How to cut back Salvia nemorosa 'Caradonna' 03:33 – Verbena bonariensis (Tall verbena) 04:38 – Echinacea purpurea (Purple coneflower) 05:01 – Helenium (Sneezeweed) 05:36 – Leucanthemum vulgare (Oxeye daisy – National flower of Denmark) 05:55 – Coreopsis (Tickseed) 06:21 – Eutrochium purpureum (Joe-Pye weed) 08:17 – Buddleja davidii 'Butterfly Candy Little Ruby' 09:01 – Lychnis/Silene coronaria (Rose campion) 09:47 – ✂️ How to freshen up Alchemilla mollis (Lady's mantle) 11:05 – Anemone hupehensis (Japanese anemone) 11:28 – Lysimachia ciliata 'Firecracker' 12:16 – ❌ Bindweed – How we remove it naturally 12:41 – Echinacea 'Green Twister' 13:35 – Allium senescens 'Millenium' 13:50 – Cimicifuga ramosa (Black cohosh) 14:05 – Lysimachia clethroides (Gooseneck loosestrife) 15:16 – Gaillardia (Blanket flower) 16:00 – Sanguisorba officinalis (Great burnet) 18:19 – Thalictrum delavayi (Chinese meadow rue) 19:35 – Sanguisorba 'Pink Brushes' 20:15 – Stachys monieri (Betony) 22:55 – Rudbeckia hirta (Black-eyed Susan) 23:45 – Collecting Silene dioica seeds 26:03 – Monarda (Bee balm) 26:35 – Agastache (Anise hyssop) 26:53 – Aster 28:15 – Althaea officinalis (Marshmallow) 30:41 – Daucus carota 'Dara' (Ornamental carrot) 31:00 – Liatris (Blazing star) 31:42 – Seeds of Thalictrum 'Black Stocking' 34:28 – Sedum ‘Touchdown Teak’ 35:08 – Phlox 35:21 – Achillea millefolium (Yarrow) 35:36 – Physostegia virginiana (Obedient plant) 37:10 – Verbena ‘Bampton’ 38:47 – Lysimachia punctata (Yellow loosestrife) 38:55 – Anaphalis triplinervis (Pearly everlasting) 39:15 – Kniphofia (Red hot poker) 39:33 – Verbena hastata (Blue vervain) We hope you enjoy hearing how we care for our pollinator-friendly garden in mid-summer — including tips for cutting back, saving seeds, and managing aggressive growers like bindweed. Whether you're here for planting inspiration or practical guidance, we hope this stroll through the garden brings some joy and ideas for your own space. Here's what we had in the garden just a few weeks ago: https://youtu.be/W5JBkKUkSY0?si=xj0HtlLVukeNdyuG And here's some of the seeds we're collecting now: https://youtu.be/DEvezIW9iME?si=GehUH1052bvkwfT- Don't forget to subscribe and follow to see what's growing in our garden. Instagram: https://bit.ly/IGPerennialGarden #cottagegarden #perennialgarden #seedsaving #pollinatorgarden
Play Video
Play Video
31:29
How to Collect Seeds | 17 Free Perennials for Next Year | Perennial Garden
We're out in the garden today collecting seeds in late July from 17 beautiful cottage garden perennials and biennials. Join us here in Denmark (USDA zone 8a equivalent), as we show you when and how we harvest seeds from a wide range of pollinator-friendly flowers. Here's what we're collecting: 00:16 – Viscaria vulgaris (German catchfly/Sticky catchfly) 03:27 – Salvia nemorosa 'Ostfriesland' (Wood sage) 04:28 – Aquilegia (Columbine) 06:39 – Papaver somniferum (Opium poppy) 09:04 – Polemonium caeruleum (Jacob’s ladder) 10:20 – Lupinus (Lupin) 12:21 – Allium 'Mount Everest' (Giant ornamental allium) 15:12 – Delphinium (Larkspur) 16:15 – Linaria purpurea (Purple toadflax) 17:42 – Silene dioica (Red campion) 19:43 – Astrantia (Masterwort) 21:04 – Silene vulgaris (Bladder campion) 22:22 – Dianthus barbatus (Sweet William) 24:22 – Centranthus ruber (Red valerian) 25:31 – Lychnis chalcedonica (Maltese cross) 27:07 – Digitalis (Foxglove) 28:51 – Cephalaria gigantea (Giant scabious) Why save seeds in your own garden? • Grow more flowers without buying new plants • Encourage biodiversity & pollinators (the bees will thank you!) • Share and store your favourite varieties • Learn about plant life cycles and natural rhythms Here's more information on collecting and sowing seeds ➡️ https://www.youtube.com/playlist?list=PLKlRXjB7gnsx7dS9eApMc_7rytTEvXFwQ Filmed in our cottage-style garden on the east coast of Denmark, we hope this video will be helpful for gardeners in cool temperate climates or USDA zones 7–8. #seedsaving #cottagegarden #SummerSeeds #seeds #seedhaul Don't forget to subscribe and follow to see what's growing now. Instagram: https://bit.ly/IGPerennialGarden
Play Video
Play Video
48:18
June Garden Tour I 40+ Flowers Blooming Now | Perennial Garden
Join us for our June garden tour here in Denmark (Zone 8a equivalent). More than 40 perennials are in bloom — from tall delphiniums and salvias to bee-loved poppies and astrantias. We’ll also share what we’re cutting back, which flowers we’re saving seed from, and how we keep borders looking full through early summer. ➡️ We're on the east coast of Denmark, similar to Zone 8a VIDEO HIGHLIGHTS 0:00 Our garden in June 0:46 Papaver somniferum 'Lauren's Grape' (Opium poppy) 1:19 Veronica spicata (Spike speedwell) 2:18 Heliopsis 'Burning Hearts' (False sunflower) 3:12 Salvia nemorosa 'Caradonna' (Balkan clary) 4:00 Linaria (Toadflax) 4:58 Centranthus ruber 'Coccineus' (Red valerian) 6:12 Lychnis chalcedonica (Maltese cross) 6:31 Thalictrum aquilegifolium 'Black Stockings' (Meadow rue) 8:15 Delphinium (Delphinium) 9:28 Physocarpus opulifolius 'Diabolo' (Ninebark) 10:29 Salvia nemorosa (Balkan clary) 10:48 Scabiosa japonica (Japanese pincushion flower) 11:44 Geranium pratense (Meadow cranesbill) 12:19 Allium 'Millennium' (Ornamental onion) 12:43 Astrantia (Masterwort) 16:08 Hydrangea macrophylla 'Eclipse' (Bigleaf hydrangea) 16:25 Salvia nemorosa 'Caradonna Pink' (Balkan clary) 16:44 Salvia viridis 'Pink Sunday' (Annual clary) 17:51 Knautia arvensis (Field scabious) 18:39 Antirrhinum Antirinca Copper Apricote (Snapdragon) 20:46 Lychnis chalcedonica (Maltese cross) 21:01 Delphinium (Delphinium) 21:21 Centranthus ruber 'Albus' (White valerian) 21:43 Phlomis tuberosa (Jerusalem sage) 22:12 Persicaria affine 'Darjeeling Red' (Knotweed) 23:40 Eryngium (Sea holly) 24:23 Salvia nemorosa 'Ostfriesland' (Balkan clary) 25:27 Thymus serpyllum (Creeping thyme) 26:09 Gaillardia (Blanket flower) 26:56 Lysimachia punctata (Yellow loosestrife) 27:48 Dianthus barbatus (Sweet William) 28:42 Salvia nemorosa 'Schneehügel' (Balkan clary) 29:22 Silene coronaria (Rose campion) 29:35 Alchemilla mollis (Lady’s mantle) 29:48 Achillea millefolium (Yarrow) 30:24 Salvia verticillata 'Purple Rain' (Whorled clary) 30:40 Lysimachia ciliata 'Firecracker' (Fringed loosestrife) 32:45 Lavandula 'Thumbelina Leigh' (Lavender) 33:18 Collecting Silene dioica seeds (Red campion seeds) 34:43 Checking on the Dahlias 38:22 Silene vulgaris (Bladder campion) 39:14 Penstemon digitalis (Beardtongue) 40:10 Cephalaria gigantea (Giant scabious) 42:28 What’s flowering at the public garden where Lars works We'll share a mix of perennials, biennials, and cottage garden favourites that thrive in June, with something always catching the eye — whether you’re looking for ideas for your own garden, or just want to enjoy a peaceful wander through ours. Here's more about how we stake our perennials ➡️ https://youtu.be/RlN5N7EzsdY?si=8pW4YQq9W9Rj0NWf And if you're looking for more cottage garden plant combinations, here are a few of our favorites ➡️ https://youtu.be/07KE_stUJk8?si=uy4Gi9QsYQaBLfx9 Watch more seasonal garden tours: ➡️ https://youtu.be/O47KFSSMT-s?si=DePTHj5KNM83tug9 ➡️ https://youtu.be/QAcc0hJyyqg We hope this gives you a bit of inspiration and a moment to slow down. Do let us know what’s flowering in your garden this month — we love hearing from other gardeners! Don't forget to subscribe and follow to see what's growing in our garden. Instagram: https://bit.ly/IGPerennialGarden #gardentour #cottagegarden #perennials #summerflowers #pollinatorplants #relaxinggarden #gardeninspiration
Play Video
Play Video
01:10:46
Rain Sounds in the Garden | Listen to 1 Hour of Real Nature Sounds (No AI)
Spend a peaceful hour in our cottage garden during a gentle afternoon rain in June. This real-time video captures the natural sounds of raindrops falling on flowers, leaves, and earth — no music, no talking, just nature being itself. This is our garden here in Denmark, with no AI-generated images or sounds. Just the honest rhythm of a summer afternoon rain and the stillness of a lived-in cottage garden. If you enjoy ASMR, nature ambience, or just need a calming space to breathe, read, or rest, we hope this brings a bit of peace your way. Filmed in early summer. Light rain, soft bird calls, rustling plants, and the stillness of the garden — just as it happened. Don't forget to subscribe and follow to see what's growing in our garden. Instagram: https://bit.ly/IGPerennialGarden #relaxingnaturesounds #cottagegarden #asmrrain #naturalambience #calmvideos #realnaturesounds #slowtv #gentlerain
Play Video
Play Video
31:09
20 Perennials & Biennials That Bloom in June | Summer Garden Color | Perennial Garden
Perennials blooming in June bring so much colour and life to the garden. In this video, we take a walk through the plants that are flowering right now – mostly perennials, with a few biennials and short-lived perennials mixed in. Here are a few of the flowers in our Danish garden (similar to Zone 8a) right now: 0:00 – Perennials that bloom in June 0:29 – Trollius chinensis (Chinese globeflower) 1:11 – Centranthus ruber (Red valerian) 2:16 – Lychnis chalcedonica (Maltese cross) 3:07 – Delphinium (Delphinium spp.) 5:24 – Veronica spicata (Spike speedwell) 6:57 – Salvia nemorosa 'Ostfriesland' 8:20 – Salvia nemorosa 'Caradonna' 9:11 – Salvia nemorosa 'Schneehügel' 10:13 – Knautia arvensis (Field scabious) 14:34 – Phlomis russeliana (Turkish sage) 16:01 – Phlomis tuberosa (Jerusalem sage) 16:38 – Digitalis purpurea (Common foxglove) 18:57 – Dianthus barbatus (Sweet William) 20:57 – Alchemilla mollis (Lady’s mantle) 21:44 – Linaria purpurea (Purple toadflax) 22:54 – Astrantia (Masterwort) 24:23 – Geranium pratense (Meadow cranesbill) 26:39 – Penstemon digitalis (Foxglove beardtongue) 27:29 – Thymus serpyllum (Creeping thyme) 28:38 – Silene vulgaris (Bladder campion) June is a great time of year for flowers, and many of these are reliable, easy-to-grow plants that return year after year. Some are cottage garden favourites, others are tough meadow or border plants, but all are doing their thing right now. If you’re starting a garden, or just curious to see what’s flowering in early summer, we hope this gives you some ideas and inspiration. If you'd like to see what was flowering this time last year, here's our June Garden Tours from previous seasons: https://youtu.be/O47KFSSMT-s?si=tSRzgZ9WrmyXQOpg https://youtu.be/7BfB_bBGR2I?si=_Y2rJ4L7PCrGxOIZ https://youtu.be/8i-UGrDCqvA?si=1T0KADXMzE5BEu1A Thanks for watching, and feel free to share what’s blooming in your garden in June. We love hearing what others are growing. Don't forget to subscribe and follow to see what's growing in our garden. Instagram: https://bit.ly/IGPerennialGarden #perennials #gardentour #pollinatorplants #cottagegarden #gardening #wildflowers #flowergarden #beginnergardening
Play Video
Play Video
25:42
Touring the Flower Gardens at Gråsten Palace | What’s Blooming Now + Kitchen Garden
Join us for a walk through the royal gardens of Gråsten Palace in southern Denmark, the official summer residence of the Danish Royal Family. We’ll explore the flower-filled borders, the beautiful sunken rose gardens, and the Royal Kitchen Garden and we’ll share what’s blooming now in early summer. Video Highlights: 0:00 Intro (Note: This area of Denmark is similar to USDA Gardening Zone 8) 0:31 Geranium 'Rozanne' – Cranesbill Geranium 1:05 Digitalis grandiflora – Yellow Perennial Foxglove 1:47 Achillea filipendulina – Fernleaf Yarrow 2:21 Euphorbia – Spurge 3:12 Polemonium – Jacob's Ladder 3:52 Hemerocallis – Daylily 4:46 Stachys byzantina – Lamb's Ear 5:23 Baptisia australis – False Indigo 5:39 Astrantia – Masterwort 6:07 Paeonia spp. – Peonies 6:24 How the palace garden stakes perennials with willow 7:16 Salvia nemorosa – Balkan Clary 7:39 Digitalis purpurea – Common Foxglove 8:06 Phlomis tuberosa – Jerusalem Sage (Pink Form) 8:56 Brief history of Gråsten Palace (the summer home of Danish royals) 12:12 Stop and smell the roses 14:02 What’s blooming on the far side of the garden 16:03 The sunken rose garden 16:34 Trollius chinensis – Chinese Globeflower 16:46 Tanacetum coccineum – Painted Daisy 17:11 A view of the palace from the back 19:41 Exploring the hidden rose garden 21:50 A tour of the Royal Kitchen Garden ➡️ CORRECTION. In the video, I say that the Danish monarchy is the oldest in the world. In fact, the Danish monarchy is one of the oldest in Europe, but it is not the oldest in the world. Denmark’s monarchy dates back to around the 10th century — with figures like Gorm the Old and Harald Bluetooth from roughly the year 900 or 965 AD marking its origins. In Europe, this does make it the oldest continuous monarchy. However, the Japanese imperial family holds the title for the world’s oldest continuous hereditary monarchy, tracing its lineage—albeit mythologically—back to 660 BCE, with historical records beginning in the 3rd–6th century AD. Here's what we have growing right now in our garden back home: https://youtu.be/CwiFaw77KSU?si=tJ_CeV9Jc7E2Bx-h A little about the palace: Gråsten Palace (or Gråsten Slot in Danish) is located near Sønderborg and is known for its charming English-style gardens, lush perennials, and traditional Danish craftsmanship like willow staking for tall flowers. We take you around the public garden areas and share both the plants and historical highlights that make this palace such a special place to visit. Did you know? Gråsten Palace has been the summer residence of the Danish Royal Family since the 1930s. While the palace itself is closed to the public, the surrounding gardens are open during the summer and beautifully maintained, blending formal and naturalistic design styles. Don't forget to subscribe and follow to see what's growing in our garden. Instagram: https://bit.ly/IGPerennialGarden #GraastenPalace #RoyalGardens #CottageGarden #GardenTour #PerennialGarden #DenmarkTravel #FlowerGardens #PalaceGardens #EuropeanGardens #EnglishGardenStyle
Play Video
Play Video
16:07
Planting Annuals & Prepping for Visitors | Perennial Garden
We're opening our garden to visitors this weekend and today, we’re getting things ready! In this video, we’ll take you behind the scenes as we prep our small urban cottage garden for our upcoming Open Garden day. From planting annuals grown from seeds to tidying up borders and refreshing a few key areas, we’re sharing what we’re working on. In this video, we'll talk about... – Planting annuals for color later in the summer – Easy ways to refresh tired borders – What we prioritize before opening the garden – Simple garden tasks that make a big difference We garden in a small urban space, so every detail matters, and we love showing how much you can create in even the smallest gardens. Have you ever opened your garden to visitors? Would you? Let us know in the comments. Here's what our garden looked like during our Open Garden last year: https://youtu.be/9L6QgQkvYqw?si=5J88o5rafaxFJIzg if you'd like to know the other Open Garden date... just drop us a note in the comments :) Don't forget to subscribe and follow to see what's growing in our garden. Instagram: https://bit.ly/IGPerennialGarden #CottageGarden #UrbanGarden #GardenIdeas #GardenPrep #GardenInspiration #PlantingAnnuals
Play Video
Play Video
32:53
May Garden Tour | Perennial Garden
We're located on the east coast of DENMARK -- similar to Zone 8a. In this video, we’re sharing what’s growing in our cottage garden right now. From classic cottage perennials to vibrant spring bloomers. You’ll also see how we're prolonging lupine flowering, staking perennials, and even how we propagate certain plants like Saxifraga. It's a quick look at what’s thriving in our garden in late spring, and we hope it gives you ideas and inspiration for your own space. Whether you're a new gardener or a cottage garden lover, we hope you'll find helpful tips throughout! Here's a few of the flowers we're looking at in the garden: 00:00 Quick look at the garden now 00:54 Lupinus (Lupine) 02:35 How we prolong Lupine flowering 03:50 Alchemilla mollis (Lady’s Mantle) 04:05 Silene dioica (Red Campion) 04:12 Viscaria vulgaris (Clammy Campion/Sticky Catchfly) 04:43 Aquilegia (Columbine) 05:11 Verbena bonariensis (Tall Verbena/Purpletop vervain) and Dahlias 06:15 Astrantia (Masterwort) 06:39 Saxifraga urbium (London Pride) 06:55 How to propagate Saxifraga urbium 07:44 Anemone sylvestris (Snowdrop Anemone) 08:21 Thalictrum aquilegifolium (Meadow Rue) 08:31 Heuchera sanguinea 'Leuchtkäfer' (Coral Bells) 08:52 Centaurea montana 'Grandiflora' (Perennial Cornflower) 09:15 Waiting on our Papaver orientale (Oriental Poppy) 10:12 Hemerocallis (Daylily) 10:36 Geranium phaeum 'Lady in Mourning' (Dusky Cranesbill) 11:36 Ways to stake perennials 12:15 Gaillardia 'Burgunder' (Blanket Flower) 13:10 Dianthus barbatus (Sweet William) 13:51 Iris sibirica (Siberian Iris) 16:07 Knautia macedonica (Macedonian Scabious) 17:10 Erysimum cheiri (Wallflower) 17:31 Salvia nemorosa 'Caradonna' (Balkan Clary) 17:48 How we stake perennials without metal 18:30 Thalictrum 'Black Stocking' (Meadow Rue) 18:51 Allium 'Mount Everest' (Ornamental Onion) 19:45 Planting in a Bistorta officinalis (Common Bistort) 22:45 Adding Tanacetum coccineum (Painted Daisy) to the border 24:55 Polemonium caeruleum (Jacob’s Ladder) 25:12 Aquilegia chrysantha 'Yellow Queen' (Golden Columbine) 28:35 Greenhouse update Let us know in the comments what’s blooming in your garden this May... or which plants you're most excited to grow! Here's a look at our garden last May: https://youtu.be/P78uVDIon2w?si=4_D7-KHJoJ05vKJj And a look at how much has changed in just one month: https://youtu.be/QKSOby4Gah4?si=WkexV9d3mqTMsgZk And don't forget to subscribe and follow to see what's growing in our garden. Instagram: https://bit.ly/IGPerennialGarden #cottagegarden #gardening #springgarden #perennialgarden #springflowers
Play Video
Play Video
27:25
12 Easy Perennials to Take Cuttings From in May | Perennial Garden
➡️ Note: We do not use rooting hormone Want more plants without spending a fortune? In this video we share 12 perennials that are easy to propagate from cuttings in May. These are plants we grow in our own cottage garden on the east coast of Denmark (Zone 8a equivalent). We’ll show you how to take cuttings step-by-step — no rooting hormone, just the right timing, soil, and care. Perfect if you’d like to fill your garden with pollinator-friendly flowers and share extras with friends. Here are the perennials we're propagating by cuttings: 0:00 Taking perennial cuttings in May 0:13 Salvia nemorosa 'Caradonna' (Wood Sage) 0:54 What soil we use for cuttings 6:51 Sedum ‘Touchdown Teak’ (Stonecrop) 8:24 Iberis sempervirens (Candytuft) 10:37 Erysimum (Wallflower) 13:12 Nepeta (Catmint) 14:48 Heuchera (Coral Bells) 16:28 Lupinus (Lupine) 18:04 Veronica longifolia (Speedwell) 19:29 Lavandula (Lavender) 21:26 Sambucus nigra 'Black Lace' (Elderberry) 23:07 Hydrangea macrophylla (Bigleaf Hydrangea) 25:09 Dianthus barbatus (Sweet William) 26:40 Watering the cuttings We’ll cover exactly where to cut on the stem, what kind of soil to use, and how to care for your cuttings. It’s a simple, budget-friendly way to grow more plants—perfect for beginners and seasoned gardeners alike. You’ll learn how to take cuttings from Salvia, Lavender, Wallflower, Hydrangea, and more. These perennials not only root well in May, but they also bring lasting beauty to your garden for years to come. Whether you’re looking to multiply your favorite plants or start a garden on a budget, this step-by-step guide will help you grow your garden... literally. 🌿 Explore more propagation videos here: Butterfly Bush: https://youtu.be/3BEvitIAi1A?si=M1kgoba9vSItVqK2 Lupins: https://youtu.be/K192v44CfI0?si=X-hRWhBs7bhMmIFK Great cuttings in Autumn: https://youtu.be/FkQBkURMFtU?si=zQcNJ5C7mUGbgIHs Cuttings in June: https://youtu.be/TWKkl8ffE8g?si=os45MA8ZkFD8ZnHm Don't forget to subscribe and follow to see what's growing in our garden. Instagram: https://bit.ly/IGPerennialGarden #freeplants #plantpropagation #gardeningforbeginners #gardendiy #cottagegarden
Play Video
Play Video
23:59
15 Perennials That Flower in May | Cottage Garden Plants | Perennial Garden
In today’s video, we’re showcasing 15 beautiful perennials that are flowering in our cottage garden right now. Whether you're looking for new plants to grow or just want to add more color to your garden this spring, this video is packed with useful tips. We’ll also talk about the ideal soil, sun, and height for each plant—making this a great resource for anyone wondering which perennials to grow in May. From Iberis sempervirens (Candytuft) to Polemonium repens 'Stairway to Heaven,' we’ll walk you through plants that thrive in spring and offer advice on how to grow them successfully. These hardy perennials will continue to bloom year after year, making them perfect for your garden. 00:13 Iberis sempervirens (Candytuft) 02:38 Erysimum cheiri (Wallflower) 04:06 Centaurea montana 'Amethyst in Snow' (Mountain Cornflower) 07:22 Tiarella cordifolia (Foamflower) 08:35 Ajuga reptans (Bugleweed) 09:24 Euphorbia amygdaloides 'Purpurea' (Wood Spurge) 10:01 Euphorbia 'Miner's Merlot' (Spurge) 11:09 Primula sect. Dodecatheon (Shooting Star Primrose) 12:31 Veronica gentianoides (Gentian Speedwell) 14:00 Viscaria vulgaris (Clammy Cockle) 15:28 Thalictrum aquilegifolium (Meadow Rue) 16:24 Thalictrum aquilegifolium 'Black Stockings' (Meadow Rue) 17:05 Aquilegia (Columbine) 19:27 Geum (Avens) 21:14 Armeria maritima 'Düsseldorfer Stolz' (Sea Thrift) 21:35 Cerastium tomentosum 'Silverstone' (Snow-in-Summer) 22:58 Polemonium repens 'Stairway to Heaven' (Jacob's Ladder) *We're on the east coast of Denmark - similar to Zone 8a. Here's what was flowering in May last year: https://youtu.be/P78uVDIon2w?si=RZ69-3YTcXut5e1Z Got a favorite perennial in your garden? Let us know in the comments below! Don't forget to subscribe and follow to see what's growing in our garden. Instagram: https://bit.ly/IGPerennialGarden Facebook: https://bit.ly/FBPerennialGarden #perennials #cottagegarden #mayflowers #gardeningtips #FloweringPerennials #SpringGarden #gardeninginspiration
Play Video
Play Video
17:14
Planting Dahlias, Pinching & Supporting for More Flowers I Perennial Garden
Today we're planting out our dahlias and sharing everything we do to set them up for success! We’ll show you how we pinch young plants to encourage bushier growth (and more gorgeous flowers), plus how we build a simple but sturdy frame to keep them from flopping over as they grow tall. If you’re growing dahlias this year, we hope this gives you some helpful tips and inspiration! Got your dahlias in the ground yet? Let us know how yours are doing in the comments! We're on the east coast of Denmark, similar to zone 8a. What’s inside: — Planting dahlias in the garden —How and when to pinch for more blooms — Building a DIY support frame for tall dahlia varieties Here's more about the type of soil and compost we use in our raised beds: https://youtu.be/mrRt56QG7ZA?si=QzOkoz69jkqpOA2N Here's how we start our dahlias for earlier blooms: https://youtu.be/QnqqCCFOl7A?si=0gkkbIyKqojmHW27 And here's how they looked last year in our cottage garden: https://youtu.be/MlSeinGCHD8?si=cTSnpm00MM2gda0v Don't forget to subscribe and follow to see what's growing in our garden. Instagram: https://bit.ly/IGPerennialGarden Facebook: https://bit.ly/FBPerennialGarden #dahlias #flowergarden #CutFlowerGarden #SpringPlanting #GardeningTips #BackyardGarden #GardenInspiration
Play Video
Play Video
26:56
What’s Growing Now + How to Propagate Ajuga reptans & Iberis I Perennial Garden
It’s early May, and wow—so much has changed in the garden since we last brought you along! Today we’re showing what’s growing right now, giving a peek at how our King Quails are doing, and sharing a super simple way to get more plants for free. We’ll walk you through how to take cuttings from Ajuga reptans (bugleweed) and Iberis sempervirens (Candytuft)—perfect if you’re looking to multiply your plants without spending a dime. Grab a cup of tea, come stroll with us, and let’s see what’s happening out here! 06:11 How to take cuttings from Ajuga reptans (Bugle) 09:14 How to grow more Iberis sempervirens (Candytuft) from cuttings See how much has changed since our Garden Tour in April: https://youtu.be/QKSOby4Gah4?si=-Jr468JpJVXR5yQ1 Don't forget to subscribe and follow to see what's growing in our garden. Instagram: https://bit.ly/IGPerennialGarden #freeplants #plantcuttings #springgarden #gardeningtips #backyardgardening
Play Video
Play Video
18:05
Spring in the Garden | What's Blooming + Planting Echinacea 'Green Twister' | Perennial Garden
In today’s video, we’re taking you on a beautiful April garden walk! First, we’ll visit the cemetery garden where Lars works to check in on the new flower beds they planted just a year ago — you’ll be happy to see what’s already blooming! Then we'll head back to our own garden, show you what’s flowering in the front and our window boxes, and finish by planting a few Echinacea 'Green Twister' in the back garden. 1:10 — Agastache and what to do with self-sown seedlings 2:48 — Lamium maculatum (Spotted Dead Nettle) 5:52 — Doronicum orientale (Leopard's Bane) 6:36 — Primula veris (Cowslip) 7:21 — Heuchera (Coral Bells) and why dark foliage matters 8:41 — Bees loving Symphytum (Comfrey) 9:31 — Omphalodes verna (Blue-eyed Mary) in bloom 10:22 — Ajuga reptans (Bugleweed) used as ground cover 11:05 — What’s flowering in front of our house 12:23 — Garden tour: End of April update 14:38 — Planting Echinacea ‘Green Twister’ If you love cottage gardens, spring blooms, or simply seeing gardens come alive after a long winter, we hope you’ll love this one! Plus, we'll share tips on managing self-sown seedlings, great ground covers, and why dark foliage plants are must-haves for garden design. Thanks for coming along with us — it's truly one of the best times of the year in the garden! Don't forget to subscribe and follow to see what's growing in our garden. Instagram: https://bit.ly/IGPerennialGarden Facebook: https://bit.ly/FBPerennialGarden #cottagegarden #springflowers #gardening
Play Video
Play Video
37:19
April Garden Tour + Sowing Cosmos, Gladiolus & Summer Flowers | Perennial Garden
Welcome back to the garden! In this video, we’re taking you on a walk through our April cottage garden here in Denmark (similar to zone 8a). From tulips to self-sown seedlings, there's so much coming to life — and we’re adding even more by sowing summer flowers today. We’ll also share how we’re improving the garden beds with compost, show you what’s blooming now, and take a peek inside the greenhouse for an early spring update. This video includes some of our favorite perennials for early-season color, plus a few fun planting moments like sowing cosmos and seeds from @ClausDalbyEnglish 0:36 – Tulips 1:00 – New layer of compost... the perennials are going to love it ❤️ 2:38 – Bugleweed (Ajuga reptans) 3:08 – False Goat's Beard (Astilbe spp.) 3:16 – Stonecrop (Sedum spp.) 3:59 – Pasque Flower (Pulsatilla vulgaris) 4:38 – Siberian Bugloss Combination (Brunnera macrophylla) 5:13 – Ornamental Onion (Allium stipitatum 'Mount Everest') 6:02 – Perennial Cornflower (Centaurea montana 'Alba') 10:14 – Fringed Loosestrife (Lysimachia ciliata 'Firecracker') 13:56 – Bleeding Heart (Lamprocapnos spectabilis 'Alba') 15:05 – Seedlings 19:41 – Honesty (Lunaria annua) 21:13 – Annual Clary Sage (Salvia viridis) 23:24 – Planting Gladiolus (Gladiolus spp.) 25:47 – Sowing Cosmos (Cosmos bipinnatus) 28:28 – Greenhouse seedlings update 31:14 – Sowing summer flowers from Claus Dalby 35:14 – April Garden Tour Wrap-Up If you want to see how the garden compared to last April, check out this video: https://youtu.be/lL1PN8iHj4M?si=sNhOFoLh2Yl0gZzl Don't forget to subscribe and follow to see what's growing in our garden. Instagram: https://bit.ly/IGPerennialGarden Facebook: https://bit.ly/FBPerennialGarden #gardeningideas #perennialflowers #flowergarden
Play Video
Play Video
16:33
9 Perennials That Bloom in April | Early Spring Color for Cottage Gardens | Perennial Garden
Looking for perennial plants that bring early spring color to your garden? In this video, we’re walking through some of our April-blooming perennials — perfect for anyone wanting to extend the bloom season and enjoy a lively, vibrant garden from the very start of spring. Here’s what we’ll cover: 0:21 – Pulmonaria officinalis (Lungwort) 2:46 – Pulsatilla vulgaris (Pasque Flower) 4:50 – Brunnera macrophylla (Siberian Bugloss) 6:31 – Brunnera macrophylla 'Jack Frost' 7:21 – Brunnera macrophylla Variegata 8:04 – Lamprocapnos spectabilis (Bleeding Heart) 10:17 – Lamium maculatum (Dead Nettle) 11:22 – Lathyrus vernus (Spring Vetchling) 12:18 – Epimedium (Barrenwort) 13:12 – Euphorbia amygdaloides 'Purpurea' (Purple Wood Spurge) 14:14 – Euphorbia 'Miner's Merlot' 15:01 – Silene dioica (Red Campion) We’re sharing nine perennials flowering in our cottage garden here in Denmark (Zone 8a), and giving you a closer look at some beautiful perennials that shine in April. Whether you're creating a woodland corner or a colorful spring bed, these tough and beautiful plants are worth growing. We hope this video will help inspire gardeners who: – Want spring color without relying only on bulbs – Are building a cottage garden – Prefer flower that return year after year – Garden in cooler climates We hope this gives you some inspiration and helpful ideas for your own spring garden. Thanks so much for watching and being here with us! Don't forget to subscribe and follow to see what's growing in our garden. Instagram: https://bit.ly/IGPerennialGarden Facebook: https://bit.ly/FBPerennialGarden #cottagegarden #perennials #springflowers #gardentour #gardenideas
Play Video
Play Video
32:41
April Garden Tasks: Pruning Hydrangea & Butterfly Bushes + Dividing Hosta | Perennial Garden
In this video, we’re out in the April garden getting a few key tasks done — and sharing a few surprises too. We start by pruning our hydrangeas, cutting back last year’s spent blooms and chatting a bit about why and how we prune them here in Denmark (Zone 8a). Then we move on to our dwarf Buddleja (butterfly bushes) — cutting them back and taking some cuttings for propagation. And because spring is full of life, we also take a peek into the greenhouse, give an update on all the plants growing from winter-sown seeds, and... we’ve had a hatch! Our brand new king quail chicks arrived just yesterday, and they’re already full of energy. At the end, we take a moment to look at a few beautiful things beginning to bloom — like our white Dicentra (Lamprocapnos spectabilis ‘Alba’) and our Euphorbia. Want to skip ahead? 0:33 How & when to prune hydrangeas in spring 4:33 Cutting back and propagating Buddleja (Butterfly Bush) 16:37 Dividing hostas 19:24 What’s in bloom now 26:52 Newly hatched king quail chicks 28:37 Greenhouse tour (here in mid April) Our garden tools are from @DeWitGardenTools And all of that beautiful new soil is from https://www.farmergodning.dk/ Here's a look at our garden last April: https://youtu.be/lL1PN8iHj4M?si=eBQ49ca-HnmcYOgQ We hope this video brings you a bit of joy and inspiration as the garden starts to wake up. Let us know what’s blooming or hatching in your own garden this week. Don't forget to subscribe and follow to see what's growing in our garden. Instagram: https://bit.ly/IGPerennialGarden Facebook: https://bit.ly/FBPerennialGarden #hydrangeas #butterflybush #greenhousetour #WinterSowing #kingquail #gardenupdate
Play Video
Play Video
24:54
Planting Bare Root Perennials & Dahlias | Perennial Garden
Spring is here, and it’s time to get some beautiful bare root perennials and dahlias into the ground! In this video, we're planting a mix of perennials and grasses, sharing a bit about each one, and talking through the process of settling them into the garden. If you’re in a similar climate (Zone 8a, Denmark), this might be helpful – or just a nice way to spend some time in the garden together. Plants in This Video: 0:42 - Lamprocapnos spectabilis (Bleeding Heart) 4:11 - Astilbe 'Chocolate Shogun' 5:32 - Echinacea ‘Hot Papaya’ (Coneflower) 6:59 - Pennisetum alopecuroides 'Black Beauty' (Fountain Grass) 9:29 - Anemone hupehensis (Japanese Anemone) 10:30 - Lupinus (Lupine) 12:00 - Hydrangea paniculata 'Little Spooky' (Panicled Hydrangea) 14:27 - Dahlia 18:56 - Heliopsis ‘Bleeding Heart’ (False Sunflower) 22:54 - Euphorbia amygdaloides 'Miner's Merlot' (Wood Spurge) There’s something really special about planting bare root perennials. They arrive looking like nothing much at all, but with a bit of patience, they’ll grow into something truly beautiful. All of our bare root perennials are from our lovely friends at Blomster Verden: https://blomsterverden.dk/ Soil is from Farmer Gødning: https://www.farmergodning.dk/ Hope you enjoy the video! If you have any tips, questions, or favorite plants for spring, I’d love to hear from you in the comments. Don't forget to subscribe and follow to see what's growing in our garden. Instagram: https://bit.ly/IGPerennialGarden Facebook: https://bit.ly/FBPerennialGarden #Gardening #BareRootPlants #Perennials #DahliaPlanting #SpringGarden #Denmark
Play Video
Play Video
22:32
Signs of Spring | Planting Hydrangea, Wallflower Cuttings + Seedlings Update | Perennial Garden
Spring is bringing so much life to the garden! In this video, we’re planting Hydrangea macrophylla ‘Eclipse’ and Erysimum cheiri (wallflowers), showing you how we take wallflower cuttings, and checking in on our seedlings (including the Hollyhocks we started just 13 days ago). Plus, our KIng Quails are roosting, our spring bulbs are emerging, and we’re talking about perennial spacing and pruning hydrangeas. Time Stamps for Easy Navigation: 0:35 – Planting Hydrangea macrophylla ‘Eclipse’ 4:25 – Planting Erysimum cheiri (wallflowers) 6:50 – How to take wallflower cuttings 8:21 – Seedling update (Alcea rosea – hollyhocks & more) 10:27 – Our quails are roosting 12:46 – Spring bulbs are emerging 17:22 – How far apart to space perennials 20:30 – Still waiting to prune Hydrangea macrophylla If you love gardening tips, spring planting ideas, and backyard wildlife, be sure to like and subscribe for more updates. Here's more information about Farmergødning and why we love their products: https://www.farmergodning.dk/ And here's more info on how we prune our hydrangea: https://youtu.be/bbUPo-iSDoA?si=Sb0bZEts9-xfkUge #gardening #springgarden #HydrangeaMacrophylla #quails #springbulbs #perennials #gardeningtips #plantingflowers Instagram: https://bit.ly/IGPerennialGarden Facebook: https://bit.ly/FBPerennialGarden
Load More
bottom of page